How to record a lesson
Quick guide for Coaches and Riders
Coach should start
Before you start a lesson, make sure your student has installed the EQ Coach-Copilot App and registred an account. They also have to add at least one horse.
Step 1
The coach opens the home screen of the Coach-Copilot app and taps on Capture your training.
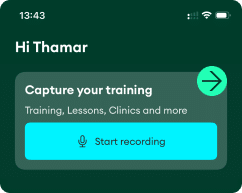
In the Activity list – select Coach.
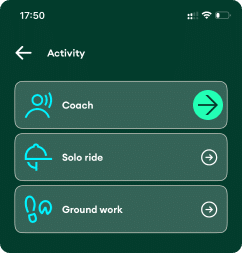
Select the Discipline for that lesson.
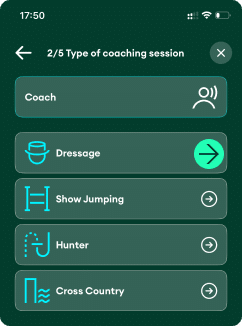
As riders list is empty, tap Add rider to connect with a new student. Next time, you can simply select them from the list.
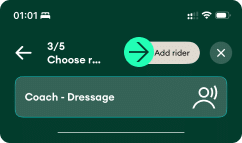
Now you can invite your rider to join the lesson.
Let them scan the QR code using their phone’s camera, or if you are doing remote lesson, send the invitation link via WhatsApp or another messenger.

Rider’s actions
Step 2
The rider scans the QR code from the coach’s phone and receives an invitation for the lesson.
The rider taps Select horse to choose a horse from the list or add one if needed.

The rider taps Add Horse to create new a horse or select from the the list of horses.

Now the rider consents to the audio recording of the lesson and accepts the invitation from the coach.

Coach continues
Step 3
The coach receives the acceptance from the rider. Usually, it takes 2–3 seconds, but it may take up to 30 seconds in case of a slow internet connection.


When the rider is on the horse and the coach is ready to start the lesson, press Start recording.

Finishing the lesson
Final steps
When the lesson is over, the coach taps Stop and summarize.

Tap Stop and summarize to send the recording to Coach-Copilot for processing.

When the summary is ready, the coach will receive a message: Ready for review.

How to record a lesson
Quick guide for Coaches and Riders
Coach should start
Before you start a lesson, make sure your student has installed the EQ Coach-Copilot App and registred an account. They also have to add at least one horse.
Step 1
The coach opens the home screen of the Coach-Copilot app and taps on Capture your training.
In the Activity list select – Coach. This activity type is available only if you have Coach role confirmed in the App. If you don’t see it, you can request it by submitting Apply for Coach form located below on the home screen.
Now select the Discipline for your lesson.
If your riders list is empty, tap Add rider to connect with a new student. Next time, you can simply select them from the list.
Now you can invite your rider to join the lesson.
Let them scan the QR code using their phone’s camera, or send the invitation link via WhatsApp or another messenger.
Rider’s actions
Before the rider can continue, they must have installed the EQ Coach-Copilot app and registered an account. They also need to add at least one horse.
Step 2
The rider scans the QR code from the coach’s phone and receives an invitation for the lesson.
The rider taps Select horse and then follow to Add Horse to create a new ot choose a horse from the list.
Now the rider consents to the audio recording of the lesson and accepts the invitation from the coach.
Coach continues
Step 3
The coach receives the acceptance from the rider. Usually, it takes 2–3 seconds, but it may take up to 30 seconds in case of a slow internet connection.
When the rider is on the horse and the coach is ready to start the lesson, press Start recording.
Finishing the lesson
Final steps
When the lesson is over, the coach taps Stop and summarize.
Tap Stop and summarize to send the recording to Coach-Copilot for processing.
When the summary is ready, the coach will receive a message: Ready for review.

